I was thinking....hmmmm....What to do for our very first project together...
Something small
Something easy
Something FUN!
And something that says "us" or that we can all relate to as a group
So, I came up with this:
From the Studio BAD keychain!
What. Is. Not. To. Love.
All the sistas will want one!
lol
So here we go!
Here is what you will need:
 |
| (Click on that to make it bigger, in case you can't read it this size...) |
You can choose to do the one with the HSTs or the plain one.
Because we love our Marla.
I have chosen colors that I hope reflect the most awesome stack of fabric ever, of course.
The famous Penelope Jones' stack o' fabric in our From the Studio header!
For the 4-patches, let's do it Lynn's way!
Your 2 contrasting 2" squares:
Put them right sides together and sew 1/4" down each side
While you're at the machine, also sew down either side of the diagonal for the HSTs, with your other two squares, if you want that version! Sew those seams a scosh scanter than usual from the center line, which you may or may not bother to actually draw. Just so you know the seam allowance on those HSTs, once you cut them apart, will be a generous 1/8", rather than a scant 1/4".
I am sorry that this picture above is sideways. I have just tried for an hour to turn it once counterclockwise and it just will not do it. So kindly tip your head towards your right shoulder as you view it and it will be perfect.
Next, go ahead and cut the 4-patch block down the middle, parallel to your stitching, 1" from the edge.
Also cut the HST block between the stitch lines.
Square those HSTs to 1 1/2"
Now, you should have this:
Put those 4-patch units together like this:
And sew down each side, 1/4" from the edge
Now, cut THAT apart...
And Voila! Open them up and spin your seams on the back.
Just because you can.
Now you lay out your mini block...
Either way...
Sew it together, like normal, then flip it over and spin those seams again!
Because it is super fun!
Go ahead and square that up. Should be right about 2 1/2".
Now, take your 3 1/2" square and lay it wrong side up on the table.
Place your batting square on top.
Place your mini block up top...
Quilt as desired.
Or not.
Either way.
I kind of like the quilting though! lol
Once you've quilted it, you can trim the whole thing to the 2 1/2" size.
Set that aside!
We gotta make the hanging loop and the back now!
You can use a piece of cord or a shoestring instead of this step!
But here goes...
Your 2 1/2" x 3/4" rectangle:
in half
put sides to center fold, inside...
(You can of course press it with an iron, I just finger pressed)
Sew it.
Pin as stiletto. Handy to guide that end through!
Tack that loop onto the top, front of your block, about 1/8" in from the edge.
Now, for the back...
Take your 2 1/2" squares and fold them in half. Press.
NOTE! When you fold them in half, for this project, it improves the final result if the fold here on these back pieces is along the lengthwise (non-stretchy!!) grain of the fabric.
I know they are small. But even so, they do look a lot neater and stay that way, if time is taken to do it this way.
So, then you lay them out in the following manner:
Folds towards the center!
Double check...All the folds to the center...Right?!
Okay, so layer it with your quilted block...
Pin as desired. Sometimes I pin, sometimes not. Whatever. Be happy.
Starting at the top edge, anywhere between the corner and where the loop is, sew allll the way around. I found it good to keep slightly shorter than usual stitch length.
Ending at the top, past the loop and backing up over it again! So that makes 3 or 4 times over that loop, It's not coming loose. lol
Trim and grade the seam allowances away, all the way around...
From both sides
And you're ready to reach in under the back and turn the whole thing outside out!
It is a bit fiddly.
lol
But they are so CUTE!!
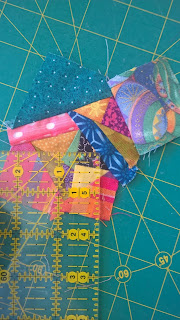
Lookit here, this one Jenny! Crumbettes! lol
Just cut the 1 1/2" squares from your made fabric : )
I made a bunch of 'em...!
Here's my other favorite one, with the Liberty lawn, little tiny orange flowers on the blue background! Aaawwwww!
I hope you all enjoy this project!
Much love,


1 comment:
I really like this... Will show you when I get a couple done! Thank You Sarah!💚 😇
Post a Comment